
Glo Fiber SmartBiz FAQs
Where can I download the SmartBiz app?
- From the Apple App Store or Google Play Store
What languages does SmartBiz support?
- English, French (Canadian), Spanish, and German
How do I add another admin to SmartBiz app?
- Go to Settings, tap Account and Admins, and tap Invite Admin
- Enter their name and email address
- Tap Send Invite
How do I change or remove the secondary admin in the app?
- Go to Settings and tap Account and Admins
- Tap the Secondary Admin to view their profile
- Tap Delete Person and confirm the deletion
How do I change the Primary user of SmartBiz to a different user?
- Reach out to your service provider to request a Primary user change
How do I set up the Primary network?
- Go to Networks, tap the Primary network, and tap Edit
- Enter a Network Name (SSID) and Wi-Fi Password and select a Security Type
- Tap Save
- Tap Network Security
- See How do I set up the Trusted List?
- See How do I set up Skipped Devices?
- See How do I set up Intrusion Settings?
- Tap Content Restrictions
- See How do I set up Content Restrictions?
How do I set up the Point of Sale network?
- Go to Networks, tap the Point of Sale network, and tap Edit
- Tap to enable Wired and/or Wireless Network Access
- Enter a Network Name (SSID) and Wi-Fi Password and select a Security Type
- Tap to enable or disable the following options:
- Broadcast SSID: allows devices to discover the Wi-Fi network
- Intra-Isolation: prevents devices on the Point of Sale network from connecting to each other. Only enable if all devices connect to the Internet independently and don’t communicate with other devices on the network.
- Inter-Isolation: prevents devices on the Point of Sale network from seeing or being seen by devices on other networks; cannot be disabled
- Tap Save
- Tap Network Security
- See How do I set up the Trusted List?
- See How do I set up Skipped Devices?
- See How do I set up Intrusion Settings?
- Tap Content Restrictions
- See How do I set up Content Restrictions?
How do I set up the Staff network?
- Go to Networks, tap the Staff network, and tap Edit
- Choose the Network Configuration:
- Shared Password: all employees connect to the network using the same password; individual Staff profiles are not available
- Enter a Network Name (SSID) and Wi-Fi Password and select a Security Type
- Individual Passwords: create individual Staff profiles with unique auto-generated passwords; connected devices are associated with a specific profile
- Enter a Network Name (SSID)
- Tap Save
- Tap Network Security
- See How do I set up the Trusted List?
- See How do I set up Skipped Devices?
- See How do I set up Intrusion Settings?
- Tap Content Restrictions
- See How do I set up Content Restrictions?
- Tap Network Access Hours
- Tap the Network Hours dropdown and select a schedule:
- Always On: network is always available
- Every Day: network is available for the same hours every day
- Custom: network availability can be customized with a variety of time periods throughout the week
- Tap Save
How do I set the Customer Network?
- Go to Networks, tap the Customer Portal network, and tap the toggle to Enable Customer Portal
- Tap Page Content
- Enter a Network Name (SSID)
- Enter a Page Heading
- Tap Upload and select a Cover Photo
- Select the Login Requirements
- Email, First Name, Last Name: collect personal information for marketing purposes
- None: will not collect personal information
- Tap the Anti-spam Content toggle to enable or disable marketing communications opt-in
- When enabled, tap the Anti-spam Consent dropdown to select the Anti-spam Consent type
- Enter the Anti-spam Consent webpage URL or plain text
- Please check if Anti-spam Consent is legally required in your locality
- Tap the Terms of Service dropdown to select the Terms of Service type
- Enter the Terms of Service webpage URL or plain text
- Enter Button Text
- Tap Save
- Tap Branding
- Tap Upload to select a Logo image
- Enter a Background Color hex code or tap the color block and select a color
- Enter a Font Color hex code or tap the color block and select a color
- Enter a Primary Button Color hex code or tap the color block and select a color
- Enter a Button Font Color hex code or tap the color block and select a color
- Tap Save
- Tap Network Access Hours
- Tap the Network Hours dropdown and select a schedule:
- Always On: network is always available
- Every Day: network is available for the same hours every day
- Custom: network availability can be customized with a variety of time periods throughout the week
- Tap Save
- Tap Network Security
- See How do I set up the Trusted List?
- See How do I set up Skipped Devices?
- See How do I set up Intrusion Settings?
- Tap Content Restrictions
- See How do I set up Content Restrictions?
- Tap Customer Portal Visitors
- To adjust the Login Retention period:
- Tap Edit
- Tap the Login Retention dropdown and select a retention period
- Tap Save
- To receive a list of customers who accessed the Customer Portal:
- Tap Email Customer List File
What does the Security Type (WPA) setting mean?
- WPA (Wi-Fi Protected Access) is an encryption protocol for Wi-Fi network security
- It is recommended to use the most recent version of WPA that is supported by connected devices
- WPA2 was ratified in 2004 and will be supported by nearly all devices
- WPA3 was ratified in 2018 and will be supported by modern devices
How do I edit a Network Name (SSID) or Wi-Fi Password?
- Go to Networks, tap the Network you want to modify, and tap Edit
- Change the Network Name and/or Wi-Fi Password
- Tap Save
How do I set up Content Restrictions?
- Tap the toggle of the following restrictions to enable or disable:
- Safe Search: filters out potentially offensive and inappropriate search results
- YouTube Restrictions: filters out potentially mature and inappropriate video content
- Block DNS over HTTPS: prevents resolving encrypted DNS requests
- Does not prevent encrypted website traffic (e.g., https://abc.xyz)
- Block iCloud Private Relay: prevents routing web traffic through Apple’s iCloud service
- Tap Content Restrictions
- Tap the dropdown menu to select a preset grouping of content categories
- Alternatively, tap the toggle of individual categories to enable restricting that type of content
- Tap Applications
- Search for specific mobile applications
- Tap the mobile application to set restrictions
- Block: total restriction
- Always allow: no restriction
- Allow for: restricted after a set amount of usage
- Tap the X to remove the mobile application restriction
- Tap Websites
- Enter a website URL and tap the + button to set restrictions
- Tap Block or Always Allow
- Tap the X to remove the website restriction
What is the Trusted List?
- A list of website URLs that have been designated as trusted and will not be monitored for cyberthreats
- You should only add URLs to the Trusted List when you are confident that they are safe
How do I set up the Trusted List?
- Tap Trusted Websites
- To add a website, tap the + button, enter the website URL, and tap Save
- Website URLs in the Trusted List will not be monitored for cyberthreats
- You should only add URLs when you are confident that they are safe
What is the Skip Devices feature?
- Selecting a Device bypasses Network Security by disabling packet inspection of its network traffic
- Skipped Devices will not trigger any Security Alerts
How do I set up Skipped Devices?
- Tap Skipped Devices
- To select or deselect a Device, tap the checkbox next to a Device
What are Intrusion Settings?
- The Intrusion Prevent System provides options that enhance cybersecurity monitoring and protection
How do I set up Intrusion Settings?
- Tap Intrusion Settings
- Tap the checkbox of the following Intrusion Settings:
- IPS Protocol Anomaly: monitors your network activity for known behavior that could be indicative of a cyberattack
- IPS Port-Scan-Defense: detects and blocks malicious actors scanning your system for open network ports
- Tap Save
What information is available in Additional Details?
- Total viruses detected
- Total intrusions
- Total web threats
- Network Security uptime
- Packets analyzed today
- Last updated date/time
What are the Customer Portal Terms of Service for?
- Creating a Terms of Service helps protect your business from legal liability by outlining acceptable and unacceptable use of your Wi-Fi
- Customers will be required to accept your Terms of Service
What is the Retention Period in the Customer Portal?
- The period of time that a user can connect to the Customer Portal without re-entering their information
How do I add or remove a Staff profile from the Staff network?
- Add a Profile
- Go to Staff and tap the + button
- Enter the employee’s name and email address
- Select a Device Registration type
- High Trust: employee can connect any device
- High Control: devices require approval through SmartBiz, limited to 3 devices
- Delete a Profile
- Go to Staff, tap a Staff Profile, and tap Edit
- Tap Delete Staff and confirm deletion
How do I pause Internet access for a Device or Staff member?
- Go to Devices or Staff, tap a Device or Staff profile
- Tap the Internet Access toggle to disable or enable access
What information will I see in Alerts?
- SmartBiz offers a variety of Alerts relating to:
- Client and mesh device connectivity
- Internet service connectivity
- Content restrictions
- Network security
- Each Alert includes a short description and the date/time it was triggered
- Different Alerts provide additional relevant information, such as:
- IP address and name of the Device
- Website domain or URL that triggered the Alert
- Action taken against the cyberthreat
- Staff member’s name
- Content category
- And more
How do I customize my Alerts?
- Go to Settings and tap Alerts
- Tap the Push Notifications toggle to enable or disable Alerts
- Tap an Alert’s toggle to enable or disable that Alert
What happens when I get a Security Alert? Should I be worried?
- You will receive a Security Alert when SmartBiz has automatically blocked a cybersecurity threat
- You do not need to take any immediate action, but it’s recommended that you use the information in the Alert to investigate what triggered the threat and take any further action to prevent another occurrence
My device appears to be working normally, but I keep seeing a Security Alert. What do I do?
- Review the details of the Security Alert to better understand what is triggering the Alert
- If you trust the website that is triggering the Alert, you can tap Add to Trusted List to stop scanning traffic from that URL
- If you are concerned about the website or associated device, it’s recommended that you disconnect or power off the device and seek additional help
What details can I see about a Device on my network?
- Device Type
- Gateway/Mesh it’s connected to
- Download and Upload speed from most recent Bandwidth Test
- Wi-Fi protocol, Band, Channel, and Efficiency/Quality
- IP Address
- Vendor (Manufacturer)
- Model
How do I add a new Device?
- Go to Devices and tap the + button
- Devices can be added by entering the Network’s Wi-Fi credentials on the Device or using WPS
- To add via Wi-Fi credentials:
- Tap the dropdown and select which Network you want to add the Device to
- Connect the Device using the Network Name (SSID) and Password
- To add via WPS (Devices page):
- Tap the dropdown and select which Network you want to add the Device to
- Tap the Connect button to enable WPS for 2 minutes
- Press the WPS button on the Device you want to add to the selected Network
- To add via WPS (Point of Sale Network)
- Go to Networks and tap the Point of Sale network
- Tap the Connect Device via WPS button to enable WPS for 2 minutes
- Press the WPS button on the Device you want to add to the Point of Sale network
How do I approve a wired Device on my Point of Sale network?
- Go to Devices and tap the unapproved Device
- Tap Approve Device and tap /b>Okay
- If the approval was successful, it’s recommended to unplug and reinsert the Device’s Ethernet cable to ensure it’s working properly
- If the approval was unsuccessful, tap Approve Device again or unplug the Device’s Ethernet cable for a few minutes and plug it back in to trigger another approval request
How do I rename a Device?
- Go to Devices, tap the Device, and tap Edit
- Enter a new Name and tap Save
How do I view how Devices are connected and mapped in my network?
- Go to Networks and tap Network Map under Shortcuts
What is Network Resilience?
- Network Resilience enables support for a secondary Internet connection that can be used if there is an unexpected and extended outage of the primary connection
- A secondary device is required, most commonly a cellular hotspot or smartphone
- Network Resilience will detect when the primary connection stops responding and automatically switch to the secondary connection in approximately 90 seconds
- When the primary connection is restored, Network Resilience will automatically switch back in approximately 90 seconds
What devices can be used for Network Resilience?
- Any device that offers a Wi-Fi connection, such as a cellular hotspot, a smartphone with hotspot support, or a nearby Wi-Fi router with a separate Internet connection
- SmartBiz also supports a wired secondary connection, reach out to your service provider to learn if this is an option for you
How do I change my Network Resilience back-up device?
- Go to Networks, tap on Network Resilience, tap on Select a Different Failover Device
- Tap a different Failover Device SSID, input its Wi-Fi credentials, and tap Connect to Hotspot
Glo Fiber SmartBiz Help Videos
System Set Up
Connected Restaurant
Customer Portal Setup
Hacker's Playground
Enhanced Cybersecurity
Downloadable Guides

Reduce the dilemmas of your small business
As a business owner, freedom is as valuable as growth. The investment you make in customer satisfaction goes straight to your bottom line. Which is why you deserve a managed network service that frees you to focus on business instead of IT. With Glo Fiber SmartBiz, you can hit the easy button, enabling your business and customer to come first.
The Small Business Owner's Dilemma
- Employees
- Customers
- Online presence
- WiFi networks
- No IT staff
- No free time
- Need help
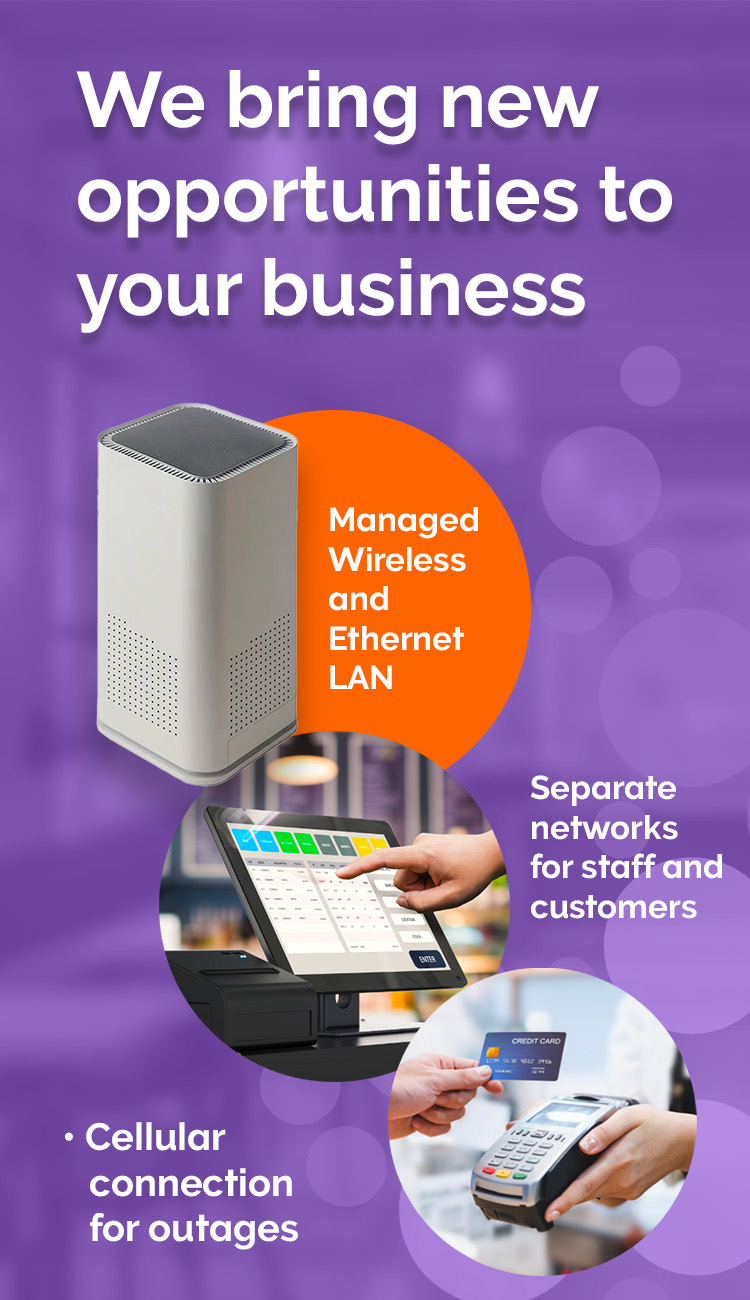
With Glo Fiber SmartBiz, you can expand your business by taking advantage of:
Dedicated Networks
Out-of-the-box owner, staff, point-of-sale and customer networks that run on both wired and wireless LAN.
Network Security
Protect your staff, critical business infrastructure, and customers from cyberattacks and viruses.
Content Restrictions
Keep your employees productive and focused on the task at hand with tailored content restrictions.
Customer WiFi Portal
Drive brand loyalty and targeted email campaigns.
Network Resilience
Ensure critical business systems are always operational.
Smart Biz is included with all 1 Gig and 2 Gig plans, and an additional $20 per month for all other plans.
With Glo Fiber SmartBiz, you have the power to create and control four distinct networks:

Primary Network
Securely support your critical small business functions such as accounting with network resilience to ensure business continuity and PCI DSS (Payment Card Industry Data Security Standard) compliance.

Staff Network
Deliver amazing bandwidth for your employee activity, including office and productivity applications, without impacting primary network functions. Even better, you can easily update access settings to keep pace with staffing changes.

POS Network
Set up a separate network for mobile payment and self-serve store check out.

Customer Network
Use a captive portal to elevate your brand, offering guests WiFi services complete with personalized business-set terms and hours.
Every type of Small Business transformation for any type of industry
Our solutions are created with local customers in mind. We put you in control of your business, modernizing any network to save time and money and deliver an exceptional customer experience. We offer powerful WiFi solutions for the following businesses.
Hospitality
Offer every hotel or restaurant guest an exceptional connected experience.
Personal Services
Securely support your employees and clients with network resilience.
Retail
Ensure seamless mobile payment and self-serve store check out.
Manufacturing
Deliver exceptional bandwidth for employees, including office and productivity applications.
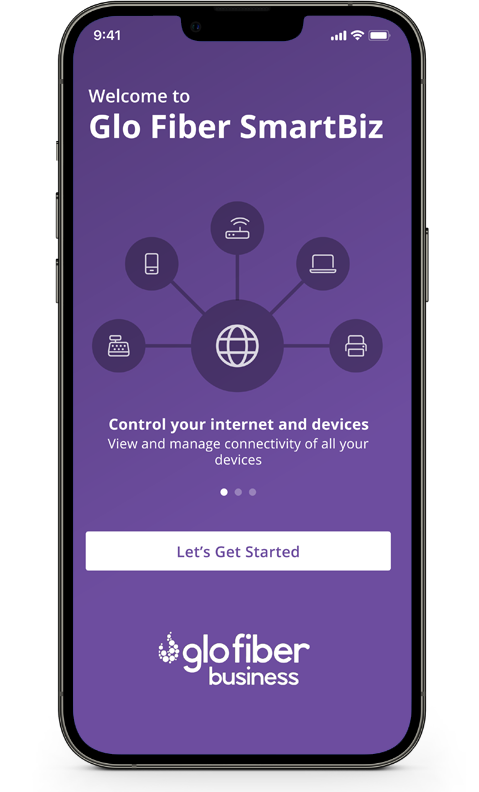
An all-in-one Managed WiFi solution built for small business.
Put the power of Glo Fiber SmartBiz in your hands with the SmartBiz app. Monitor and managed each element of the solution to match the unique needs of your small business. Set up service-specific networks, enable network security, create a branded customer WiFi portal and more!
Flexible Network Inside and Out
Our integrated solution makes connecting both wired and wireless systems seamless--giving you comfort that all your business and patron devices are connected.
Always On with Backup
SmartBiz has options for cellular backup that give you added connectivity and uptime, keeping your business running and your customers happy.
Business Grade Cyber Security
Prom POS to staff and customer guest networks, built-in firewalls and proactive network security traffic monitoring protect you from cyber threats.
Engage Your Customers
Guest WiFi delivers valuable insights so you can promote your business through a beautiful, branded and seamless interface.
.jpg)

WiFi serves as a marketing opportunity, delivering the most unique experience
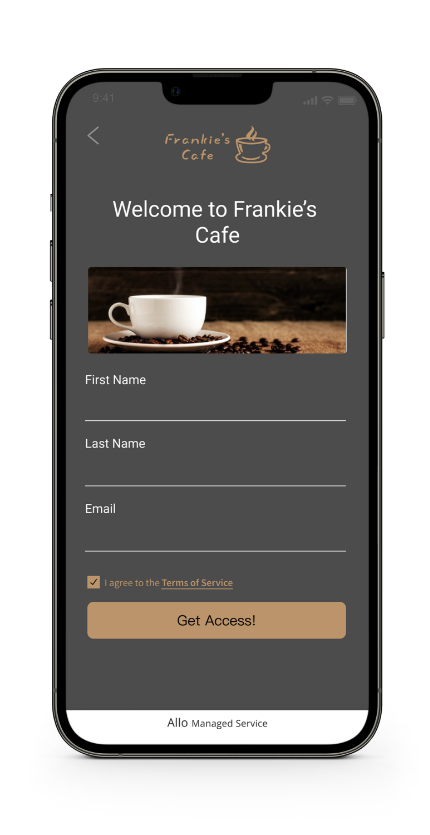
Customer WiFi Access Portal
- Collect names and email addresses
- Customer a branded welcome screen
- Set customer terms of service
- Set hours of operation
- Set session limits
- Review usage reporting
Scalable guest WiFi delivers the ultimate visitor experience
Give your customers even more reasons to visit, stay longer and be more engaged, loyal, and satisfied.